
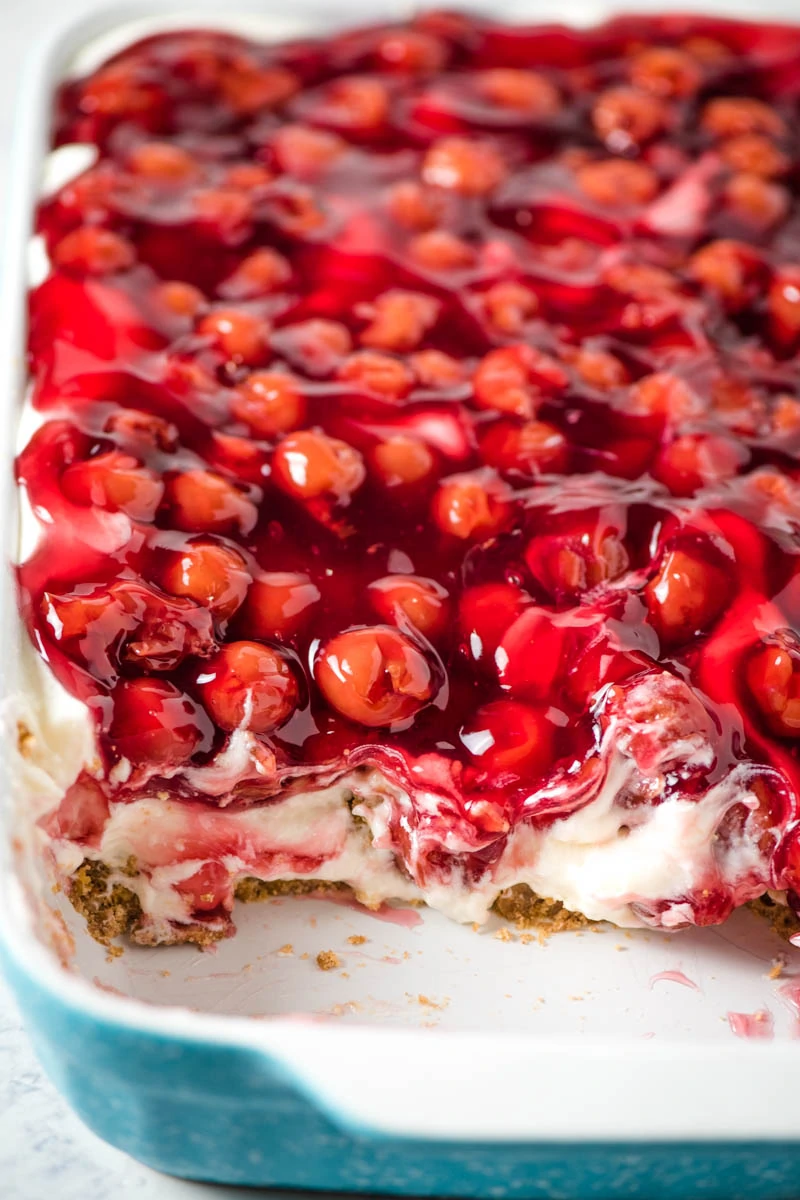
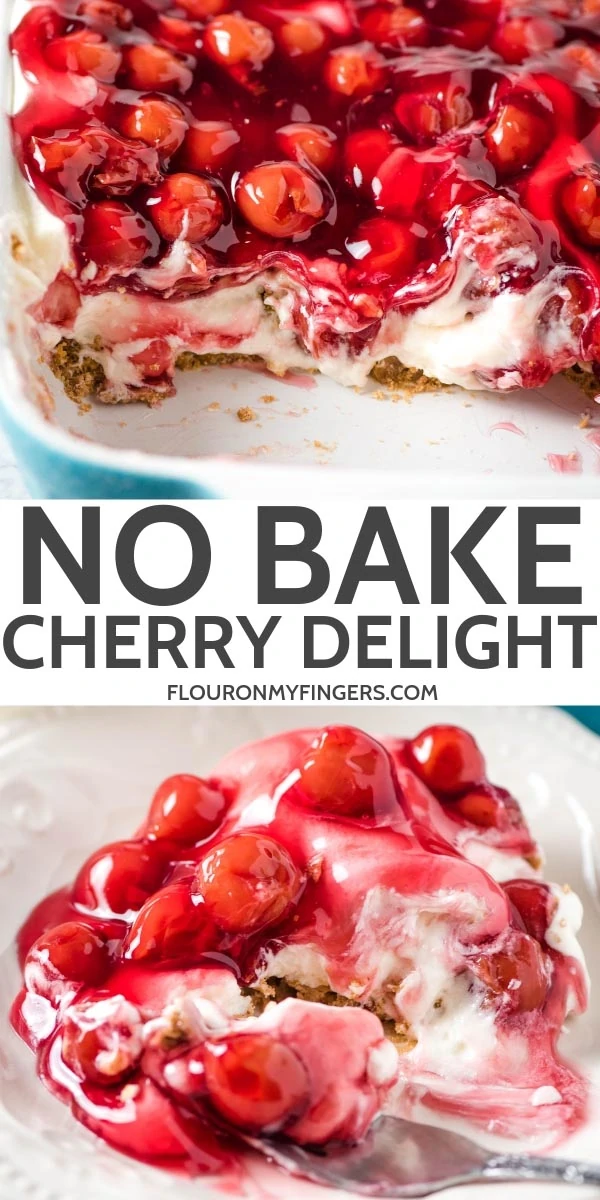
Whip up a super easy no bake cherry delight with Dream Whip, cream cheese, and a pecan crust. The best old fashioned recipe straight from Mom’s kitchen.
When I was growing up, and even still to this day, my mom made what she liked to call cherry crunch. It was pretty much a cherry delight with a pecan pie crust, a creamy Dream Whip cream cheese filling, and cherry pie filling on top.
This cherry delight recipe has always been one of my dad’s favorite desserts ever. Mom makes it for birthdays, Father’s Day, holidays, you get the picture.
Growing up enjoying this no bake cherry dessert, I looked forward to it every time I walked in the kitchen and saw Mom putting it all together.
Of course, I’ve switched it up a bit over the years too and made blueberry yum yum, strawberry delight, no bake strawberry lush, an easy chocolate delight and even a no bake pumpkin dessert during the fall season. It’s so, so good.
And it’s not all that difficult to make either. In fact, it’s super easy to make, especially if you make your crust ahead of time.

WHERE CAN I FIND THE ACTUAL RECIPE CARD?
If you’d rather skip all of my cooking tips, important cooking info for this recipe, and similar recipe ideas – and get straight to the cherry yum yum recipe – just scroll down to the bottom, where you’ll find a printable recipe card.
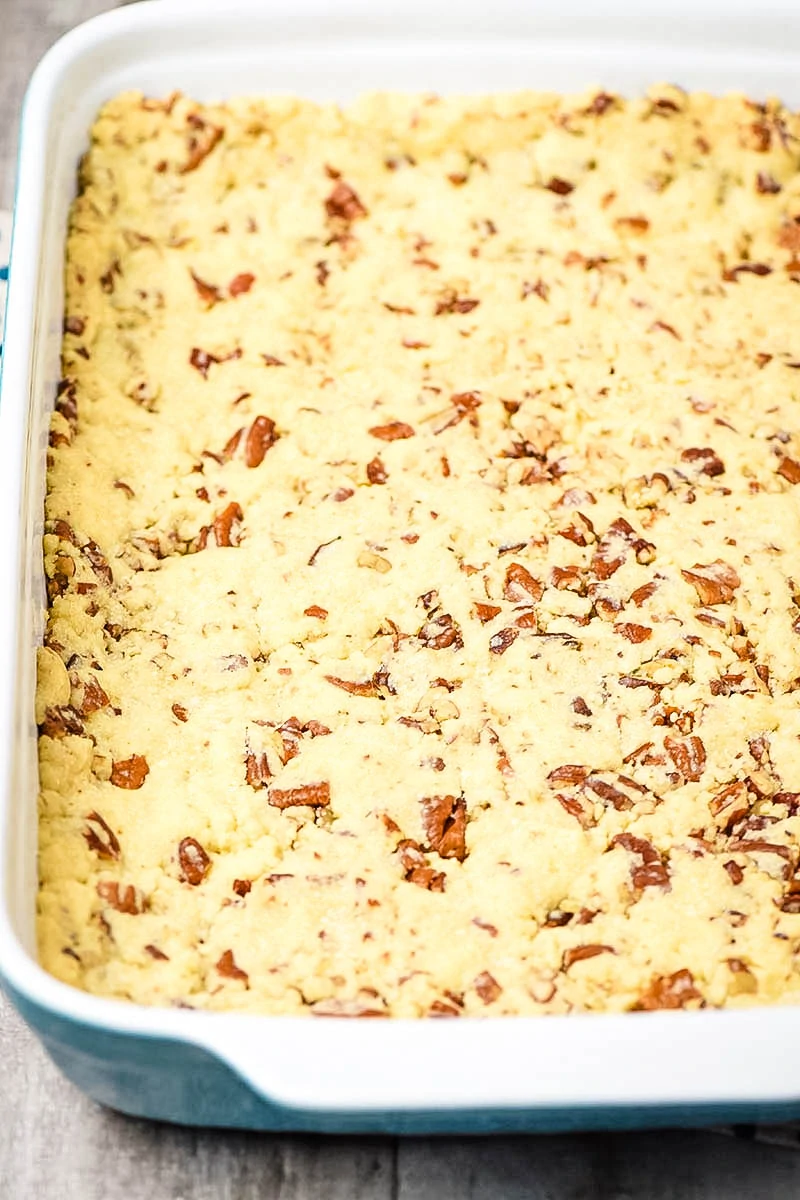
FIRST LET’S TALK ABOUT THE CRUST
The crust is really the foundation of this yum yum dessert. And it’s the only part of this dessert that requires any bake time at all.
I usually make the crust the night before so it’s already baked and cooled, and I can just throw the rest of the recipe together really quickly.
My favorite crust for this cherry cream cheese dessert is this pecan nut crust, and it requires only 4 simple steps…
- Melting the butter.
- Mixing the butter with the flour and pecans.
- Pressing the dough into a 13″x9″ baking dish.
- Then just bake and cool.
You can even bake it, cool it, and throw it in the freezer (covered, of course).
ALTERNATIVE PIE CRUST OPTIONS
Now you can get creative with the crust, as well. For instance…
- Graham cracker crust
- Pecan Sandies crust – Make it like you would a graham cracker crust. One of my readers suggested this, and I thought it was brilliant.
- Press-in pie crust without nuts
- Vanilla Wafer crust
- Line a graham cracker crust with sliced bananas – Another brilliant reader suggestion.
- Press crushed pretzels into the pie crust instead of pecans.
Speaking of bananas, this banana pudding recipe is another one of our favorite no bake desserts.
CAN I USE HOMEMADE WHIPPED CREAM?
This is a recipe for cherry delight with Dream Whip. I’ve tried making the cream cheese filling with homemade whipped cream, and for some reason, it just doesn’t work as well.
So I usually reserve my whipped topping for the top (if I even add it to the top) and use Dream Whip for the filling, which is what my mom uses in her cherry delight dessert.
Now some people do make this filling with Cool Whip, but I’ve carried on my mom’s tradition of cherry yum yum with Dream Whip, which I like to call angel fluff.
HOW TO MAKE CHERRY DELIGHT
Important tip: Before you ever start mixing, beat the cream cheese in a separate mixing bowl. This will help it soften up more, and it will blend in better with the Dream Whip, once you’re ready for that step.
- In a separate mixer bowl with an electric mixer, whisk together the Dream Whip with the milk and vanilla, according to package directions.
- Whisk the whipped cream mixture until it begins to form soft peaks, about 4 minutes.
- Mix cream cheese and powdered sugar into the Dream Whip mixture.
- Whisk the cream cheese mixture for 3 to 5 minutes, or until it’s velvety smooth and creamy.

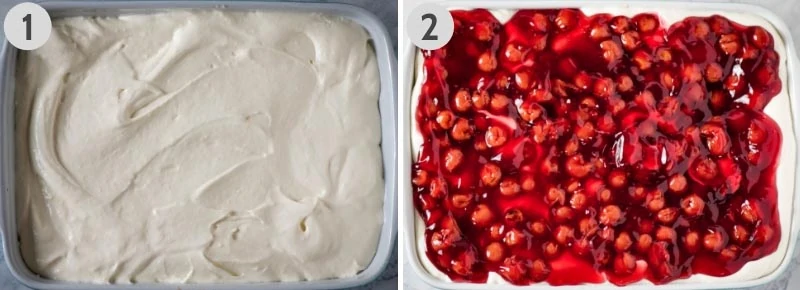
LAYER YOUR NO BAKE CHERRY DESSERT
- Add the layer of Dream Whip mixture right on top of the crust.
- Then add the cherry pie filling on top.
COUPLE TIPS…
- You can split the Dream Whip filling in half to make 2 smaller pies (also, the cherry pie filling and the crust).
- You can save back just a little bit of Dream Whip to use as whipped topping when you go to serve it.
This recipe is so easy. If you’re not quite ready to serve it, just cover it and chill in the refrigerator for a few hours or overnight, and it’ll be ready when you are.
CAN YOU FREEZE CHERRY DELIGHT?
You can definitely make this recipe ahead of time, freeze it, and thaw it when you need it.
Now one tip… I would definitely freeze it before adding the pie filling. Especially if you’re using canned pie filling, it’d be super easy to just add that later on after you’ve thawed the crust and creamy filling.
Just be sure, if you do freeze this dessert, to cover it well with freezer wrap or put it in a sealed container so it doesn’t get freezer burn.
MORE CHERRY DESSERTS FOR YOUR TABLE
SHOP KITCHEN TOOLS FOR THIS RECIPE:
13″x9″ Baking Dish – You’ll need this size baking dish for this recipe. I find myself using this size for so many recipes, not just desserts.
Mixer – You’ll need an electric mixer, preferably with a whisk attachment, to mix together the ingredients for the creamy filling.
Spatula – Where would I be without my spatulas? I have a whole slew of them because we’re ALWAYS using them.
GET THE PRINTABLE CHERRY DELIGHT RECIPE
If you love this cherry delight with pecan crust as much as we do, please write a 5 star review, and help me share the recipe on Facebook and Pinterest!
CONNECT WITH FLOUR ON MY FINGERS!
Be sure to follow me on social, so you never miss a post!
Facebook | Pinterest | YouTube | Instagram | Twitter
Sign up to receive my newsletter, filled with delicious recipes and outdoor travel adventures, in your inbox:

No Bake Cherry Delight
Ingredients
- 1 pecan nut pie crust
- 1 box Dream Whip (2 small packets)
- 1 cup whole milk
- 1 teaspoon vanilla extract
- 16 ounces cream cheese
- 2 cups powdered sugar
- 42 ounces cherry pie filling
Instructions
- Have the pecan crust baked, cooled, and ready to go.
- In a large mixing bowl, mix the Dream Whip according to package directions, whisking the 2 small packets with the whole milk and vanilla extract.
- In a separate bowl, beat the cream cheese well with a mixer.
- Add the cream cheese and powdered sugar to the Dream Whip whipped cream, whisking the mixture 'til it’s smooth and creamy.
- Spread the Dream Whip filling on top of the cooled crust in a 9×13 pan.
- Then top it all off with cherry pie filling.
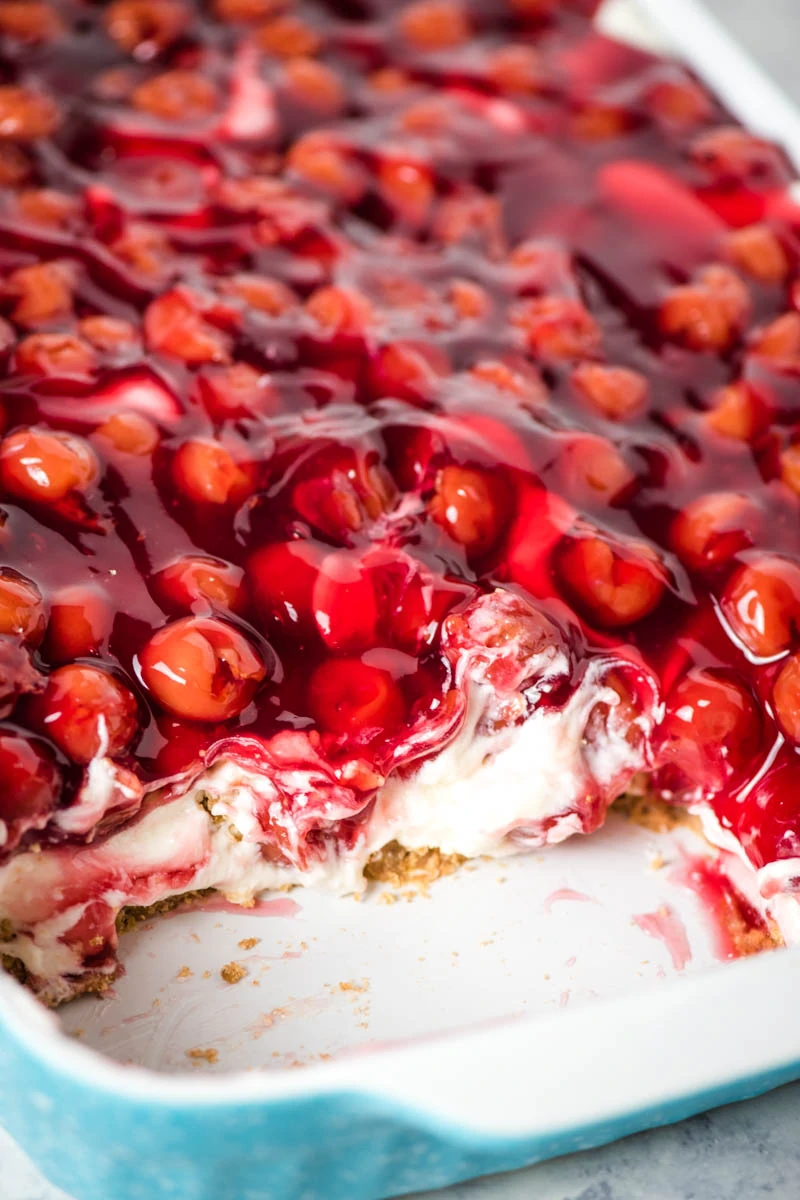
- Cover and chill in the fridge for at least 4 hours, or overnight if possible, before serving.
- When it’s ready to serve, you can top it off with a dollop of whipped cream or serve it as is. It’s so delicious!
This is the first recipe that I’ve found that uses Dream Whip instead of Cool Whip. Dream Whip is what my grandma used & I say “if it ain’t broke, don’t fix it”. I also think that the Dream Whip tastes better. Thank you, thank you, thank you for posting this “original” recipe.
Can you use cool whip instead of dream whip?
Surprised that Dream Whip is still available. Decades ago it was a favorite for desserts. I do love using Cherry Pie Filling and I am going to try it with Blueberry Pie Filling. Should be able to use Peach Pie Filling too. Love the no bake and it’s perfect for bringing a covered dish. Thanks for sharing your recipe. **
Judy, I’m a big fan of anything Dream Whip. It is so good, and it’s super easy to make, not to mention versatile. I have tried this recipe with all sorts of pie fillings…
My grandma used to make it with either cherry or blueberry pie filling. It was good either way.
This is wonderful. so creamy and sweet.
I’m glad you liked it, Linda! Thanks for the feedback.
My favorite, the pecan crust is delicious.
Thank You! It is also a family favorite around here.
HAS anyone tried adding lemon juice to the mixture
my mother in law use to make this and it was a favorite that the entire family loved. Thanks so much!
That’s so cool, Lisa! I’m really glad you liked it.
The original was one of my dad’s favorites as well. One granddaughter & I have gluten issues. I very much appreciated the recipes. Already know it will be delicious. I would very much like the printable recipe.
Thank you
That’s too bad about the gluten issues, Rhonda! I didn’t know until a few years ago, but I do believe I’ve had gluten issues all my life. Enjoy the recipe.
I have found gluten free graham crackers on misfit market. I am using a combo pecan and graham cracker crust for mine
That sounds great, Tracy! Best of luck.