
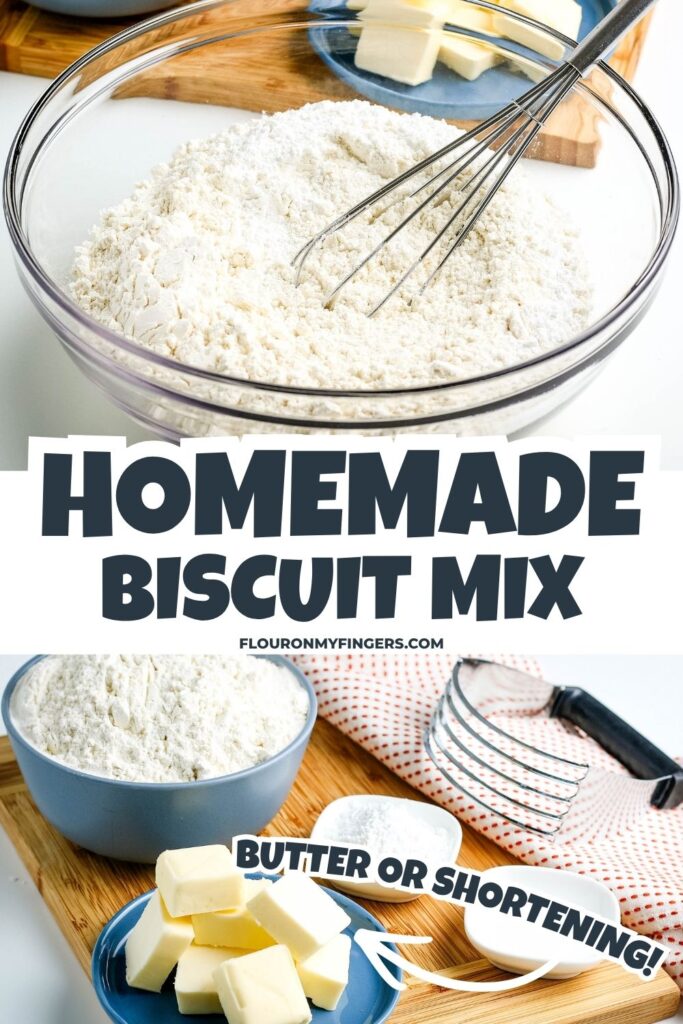


How to make easy homemade biscuit mix recipe with just 4 simple ingredients and NO toxic preservatives and artificial flavors that are found in store-bought baking mixes. Store up a big batch of this mix to make soft and fluffy, buttery biscuits from scratch in 15 minutes or less!
I used to rely on store-bought Bisquick for quick meals, but biscuits from homemade biscuit mix are so much healthier, and they taste so much better, or at least that’s what my kids tell me! You can make this recipe with butter for richer flavor (stored in the fridge or freezer) or swap in vegetable shortening for a convenient, shelf-stable pantry mix. When you’re ready to bake, simply measure out the mix, add milk, and enjoy fresh, fluffy biscuits in no time at all.

⭐️⭐️⭐️⭐️⭐️ “I’m never going back to any other biscuit.”
“These were absolutely delicious and so fluffy 😍❤️ I’m never going back to any other biscuit.”
-Rachel, Flour on My Fingers Reader
Why I Think You’ll Love Homemade Biscuit Mix
- Quick & Easy: Made with 4 basic ingredients, this mix takes 10 minutes to make. Use it to whip up flaky, buttery biscuits in under 15 minutes, including bake time.
- Long Shelf Life: Prep a big batch in advance and store it in the pantry, fridge, or freezer for quick meal prep.
- Better Than Store-Bought: Homemade Bisquick mix is budget-friendly, preservative-free and filler-free, with real homemade flavor every time!
- Gift in a Jar: Layer the dry ingredients in a mason jar with a ribbon for a thoughtful Christmas gift-swap or birthday present.
Ingredients & Substitutions Notes
This recipe uses simple ingredients, so you probably already have everything on hand.
- All-Purpose Flour – All-purpose flour works best. If you want to make gluten-free biscuit mix, substitute 1:1 with a cup for cup gluten-free all-purpose flour and a little xanthan gum (following the package directions). Or you can make my soft gluten-free drop biscuits instead.
- Baking Powder – This is the leavening agent to give these biscuits good rise in the oven. Baking powder does expire, so make sure it’s within date for the softest, fluffiest biscuits.
- Sea Salt – Table salt works too.
- Unsalted Butter OR Vegetable Shortening –
- Cold Butter: For richer flavor and flakier layers (store in the fridge or freezer). If using salted butter, reduce the actual salt in the recipe by about 1/8 teaspoon. It helps to slice it into 1/2-inch chunks before cutting it into your dry ingredients.
- Vegetable Shortening: Makes softer, more tender biscuits. Shortening makes a 100% shelf-stable mix that you can store in the pantry at room temp for 3–4 months.
You can find full ingredient amounts & instructions (with big batch ratios) in the recipe card below.

How to Make Homemade Biscuit Mix
In the steps below, I’ll show you how to make biscuit mix the traditional way using a pastry blender. I’ll also show you an easier alternative method using the food processor. I used butter, but you can swap in the exact same amount of vegetable shortening to make a shelf-stable version that doesn’t require refrigeration.
Pastry Blender Method
- Whisk together the flour, baking powder and salt in a large mixing bowl until well combined.
- “Cut” the cold, sliced butter (or shortening) into the dry ingredients using the pastry blender. The flat side of a dinner fork also works if you don’t have a pastry blender.
- Stir the mix. Continue to work on the butter until it’s slightly smaller than pea-sized, and the mixture resembles coarse bread crumbs. You can get an idea of what this looks like from the picture below.

Alternative Food Processor Method
If you have a food processor, this is a faster, less labor-intensive way to mix DIY biscuit mix.
- Add the flour, baking powder and salt to the bowl of your food processor.
- Pulse the dry mixture until well combined.
- Add the cold, sliced butter (or shortening) and pulse again to incorporate until the mixture resembles coarse cornmeal.
That’s it! You’ve got biscuit mix. Next let’s look at how to store it.
How to Store Biscuit Mix
You can choose to store your biscuit mix in the fridge, pantry, or freezer, depending on whether you used butter or shortening.
- Refrigerator Storage (Butter Version): If you used butter, store your mix in an airtight container or mason jar in the fridge for up to 3 months to keep the butter from going rancid.
- Pantry Storage (Shortening Version): If you made the shelf-stable version with shortening, it can be stored in an airtight container or mason jar in a cool, dark pantry for up to 3–4 months at room temperature.
- Freezer Storage (Both Versions): Seal the mix in an airtight container or freezer bag and freeze for up to 8 months. You can scoop it out and use it straight from the freezer!

How to Make a Big Batch (Bulk Ratios)
If you want to fill a large glass jar or canister for long-term storage, you can easily double or triple this recipe. Here are the exact ratios for a triple batch (makes a little over 10 cups of dry mix):
- 9 cups All-Purpose Flour
- 4 1/2 tablespoons Baking Powder
- 4 1/2 teaspoons Sea Salt
- 1 1/2 cups (3 sticks) Unsalted Butter OR 1 1/2 cups Vegetable Shortening
Measuring Tip: When you’re ready to bake later on, simply scoop out 1 1/2 cups of dry mix for every 6-8 biscuits, add 1/2 cup of milk, and bake!
How to Make Biscuits From Homemade Biscuit Mix
Now that you’ve made your very own biscuit mix, let’s use it to make easy homemade biscuits! Before getting started, grease up a large cookie sheet with nonstick cooking spray (or line it with parchment paper). Then preheat the oven to 400ºF.
How to Make Biscuit Dough
- Add 1 1/2 cups of homemade biscuit mix and 1/2 cup of milk to a large bowl, mixing together.
- Knead the soft, sticky biscuit dough by hand a few times until the dough comes together.
- Roll the biscuit dough out to about 1/2-inch to 1-inch thickness (depending on how tall you want them) with a rolling pin, and then cut your biscuits out with a round biscuit cutter or a large round glass cup, transferring each one to your baking sheet.
Baker’s Tip: Take care not to twist the biscuit cutter as you cut out each biscuit, but press straight down instead. Twisting the cutter can damage the structure of the biscuits and subsequently affect how high they rise.

Alternatively, you can skip the rolling pin and make drop biscuits instead. Once you’ve mixed everything together, drop the biscuit dough by the tablespoon onto your cookie sheet. A cookie scooper works really well for this!
How to Bake Homemade Biscuits
Bake homemade biscuits at 400ºF for about 7-9 minutes, or until the tops are golden brown. Slice in half and lather each half with butter and a spoonful of your favorite jam or jelly and a glass of milk. It’s the perfect occasion to pull out a jar of freezer peach jam, or you can make a fresh batch of blueberry sauce instead.

Tips for the Softest, Fluffiest Biscuits
I used to struggle with tough and dry biscuits, but over the years I’ve learned a few do’s and don’t’s for getting those tall, soft and fluffy biscuits that come to mind when I think of a diner-style biscuit.
- Use baking powder: If your biscuits failed to rise, there’s a good chance that your baking powder is bad. There is an expiration date on the can, and I’ve learned from experience that it’s best to buy fresh.
- Don’t over-knead the dough: Over-worked dough will bake into tough, rubbery biscuits because the gluten was too far developed. Mix up your biscuit dough only until combined, and then knead for just a few times. Roll it out gently so as not to strengthen the gluten.
- Don’t add more flour: Of course you’ll need to roll the dough out on a floured work surface so that it doesn’t stick to your countertop, but don’t add more flour while you knead the dough. Too much flour will make the dough dry, resulting in hard biscuits once baked.
- Chill the butter: Make sure your butter is nice and cold, straight from the fridge. You want tiny chunks of butter evenly dispersed throughout the dough. During the baking process, these butter pockets will melt and evaporate, creating tiny air pockets and flaky layers all throughout the biscuits; this extra air will also give the biscuits a little more lift for a taller rise.
- Use low-protein flour: For soft, fluffy biscuits, use a low-protein flour to minimize the gluten development. I use all-purpose flour with awesome results, but many home bakers prefer to use pastry flour instead because it has an even lower protein %, resulting in more tender, flakier biscuits.
- Don’t over-bake: If your biscuits are dry and crumbly, you probably over-baked them. At 400ºF, they’re usually done in 7-9 minutes. Bake time can vary depending on the oven, so just keep an eye on them, baking only until the tops are a light golden brown.
- Cut them out thicker: A full batch of biscuit mix yields 16 total biscuits if you cut them out to 1/2-inch thickness, but you can make taller, lighter biscuits by cutting them out to 1-inch thickness if you prefer quality over quantity.
Expert Tips and Recipe FAQs
Yes! If using self-rising flour, omit the baking powder and salt from the mix recipe entirely, as self-rising flour already contains leavening and salt.
Absolutely, I do all the time. Buttermilk adds a little tang and creates an ultra-soft crumb. If the dough feels a bit thick, add an extra tablespoon of buttermilk as needed.
You can use water or dairy-free milk (like almond or oat milk) in a pinch, but whole milk or buttermilk gives the best flavor, richness, and color.
Shortening-based mix lasts up to 3–4 months in a cool pantry at room temperature. Butter-based mix lasts up to 3 months in the refrigerator or 6–8 months in the freezer.
Yes! This mix is a direct 1:1 substitute for packaged Bisquick or any other biscuit mix in cobblers, pancakes, drop biscuits, and casseroles.
Yes, you can freeze homemade biscuit mix. Simply place your biscuit mix into an airtight container or freezer bag, and into the freezer for up to 8 months!
More Ways You Can Use Homemade Biscuits
- Biscuits and gravy: Top warm, sliced in half biscuits with a rich sausage gravy for breakfast.
- Breakfast Sandwiches: Layer with fried eggs, crispy bacon or sausage patties, and melted cheese.
- Casseroles & Pot Pies: Drop dough directly onto chicken pot pie filling or savory casseroles before baking.
- Soups & Stews: Serve warm with butter alongside hearty soups like vegetable soup, potato soup or ham and bean soup.
- Cheddar Garlic Biscuits: Mix shredded cheddar cheese and a dash of garlic powder into the dough before baking for copycat garlic cheddar biscuits, just like the ones at Red Lobster.

More Easy Homemade Baking Mixes
If you try this recipe, why not leave a star rating in the recipe card right below and/or a review in the comment section further down the page? I always appreciate your feedback. You can also follow me on Pinterest, Facebook, YouTube, and Instagram. And subscribe to my email list too!

Homemade Biscuit Mix
Ingredients
- 3 cups all-purpose flour
- 1 1/2 tablespoons baking powder
- 1 1/2 teaspoons salt
- 1/2 cup unsalted butter* cold and cubed
Instructions
Pastry Blender Method
- Whisk together flour, baking powder and salt in a large mixing bowl.
- Cut butter (or shortening) into the dry ingredients with a pastry blender or fork.
- Transfer to an airtight container or mason jar and store for up to 3 months in the refrigerator.
Alternative Food Processor Method
- To get started with the food processor method, add the flour, baking powder and salt to a food processor.
- Pulse the mixture until all of the ingredients are well combined.
- Next, add your cold, cubed butter to the dry mixture, and pulse everything together until the mixture is coarse and resembles the texture of cornmeal.
- Transfer to an airtight container or mason jar and store for up to 3 months in the refrigerator.
How to Make Homemade Biscuits with Homemade Biscuit Mix
- Lightly spray a cookie sheet with non-stick cooking spray, and preheat the oven to 400ºF.
- Start by combining 1 1/2 cups of homemade biscuit mix and 1/2 cup of milk* in a large mixing bowl.
- Once a soft, sticky dough has started to form, knead the mixture by hand a few times 'til the dough comes together.
- Once everything is mixed together well, turn the dough out onto a lightly floured work surface, and use a rolling pin to roll it out to about 1/2 inch thickness.*
- Cut your biscuits out with a round biscuit cutter or glass cup, and place each biscuit onto the baking sheet that you already greased up.
- Bake at 400ºF for 7-9 minutes, or until the tops are golden brown.
- Serve and enjoy your homemade biscuits lathered in butter with your favorite jam or jelly!

Dear G_, so much padding, so little actually said!
These were absolutely delicious and so fluffy 😍❤️ I’m never going back to any other biscuit.
I don’t see the amount of milk in recipe so how much?
Hey Mary, that’s about 1/2 cup of milk for every 1 & 1/2 cups of biscuit mix. You can use skim milk, 2%, whole milk, or whatever you have on hand. I hope this helps!
What about the milk? What kind and how much?
It says 1/2 cup of milk. I’m assuming it whole milk.
Hey Beverly, that’s about 1/2 cup of milk for every 1 & 1/2 cups of biscuit mix. You can use skim milk, 2%, whole milk, or whatever you have on hand. I hope this helps!
How much milk?