

Make classic buckeye cookie balls for your holiday candy assortment! These creamy peanut butter dessert balls are dipped in chocolate, no baking required. They’re so simple to make, and I’ll share make-ahead & freezing tips.
I’ve been making buckeye balls since I was a little girl, and now my kids help me roll and dip a couple tins full at the beginning of every holiday season. They make a great gift for friends, family and neighbors, and they last so long in the fridge that we can enjoy them all season long! Over the years, I’ve learned a few tips and tricks to get that firm, rollable peanut butter dough and a smooth chocolate coating that doesn’t crack, and here’s exactly how I do it.

⭐️⭐️⭐️⭐️⭐️ “they’re a HUGE hit with my husband and grown kids!”
“I found your recipe and I gotta tell ya, they’re a HUGE hit with my husband and grown kids! Made them as a ‘try out’ test phase for them! No doubt, these are so easy and super delicious, that they’re always asking me to make ’em….Thank you so much for sharing your family recipe for these wonderful lil gems!”
-Brenda B., Flour on My Fingers reader
Ingredient Notes & Substitutions
- Creamy Peanut Butter – Use regular creamy peanut butter (like Jif or Skippy), and avoid natural peanut butters. Natural peanut butters tend to be greasy, and your dipping chocolate may not want to coat the peanut butter balls. It’s also hard to roll greasy peanut butter dough.
- Salted Butter – Real butter makes the richest candy, but margarine will work if that’s all you have. Let it soften to room temperature first.
- Powdered Sugar – Also known as Confectioners sugar, powdered sugar makes the dough rollable. It also makes your chocolate peanut butter balls delightfully sweet.
- Chocolate Melting Wafers – I use Ghirardelli melting wafers. You can use milk, semi-sweet, or dark, and alternatively almond bark, chocolate baking bars, or chocolate chips.

How to Make Buckeye Cookie Balls
Before getting started, line a baking sheet with wax paper or parchment paper. This recipe makes about 24 buckeye dessert balls, which is enough to fill a 10×15 jelly roll pan.
Mix Up Your Peanut Butter Dough
- Add your peanut butter and softened butter to a large mixing bowl.
- Dump the powdered sugar into the same bowl.
- Mix everything together by hand or with an electric mixer until it’s blended well.
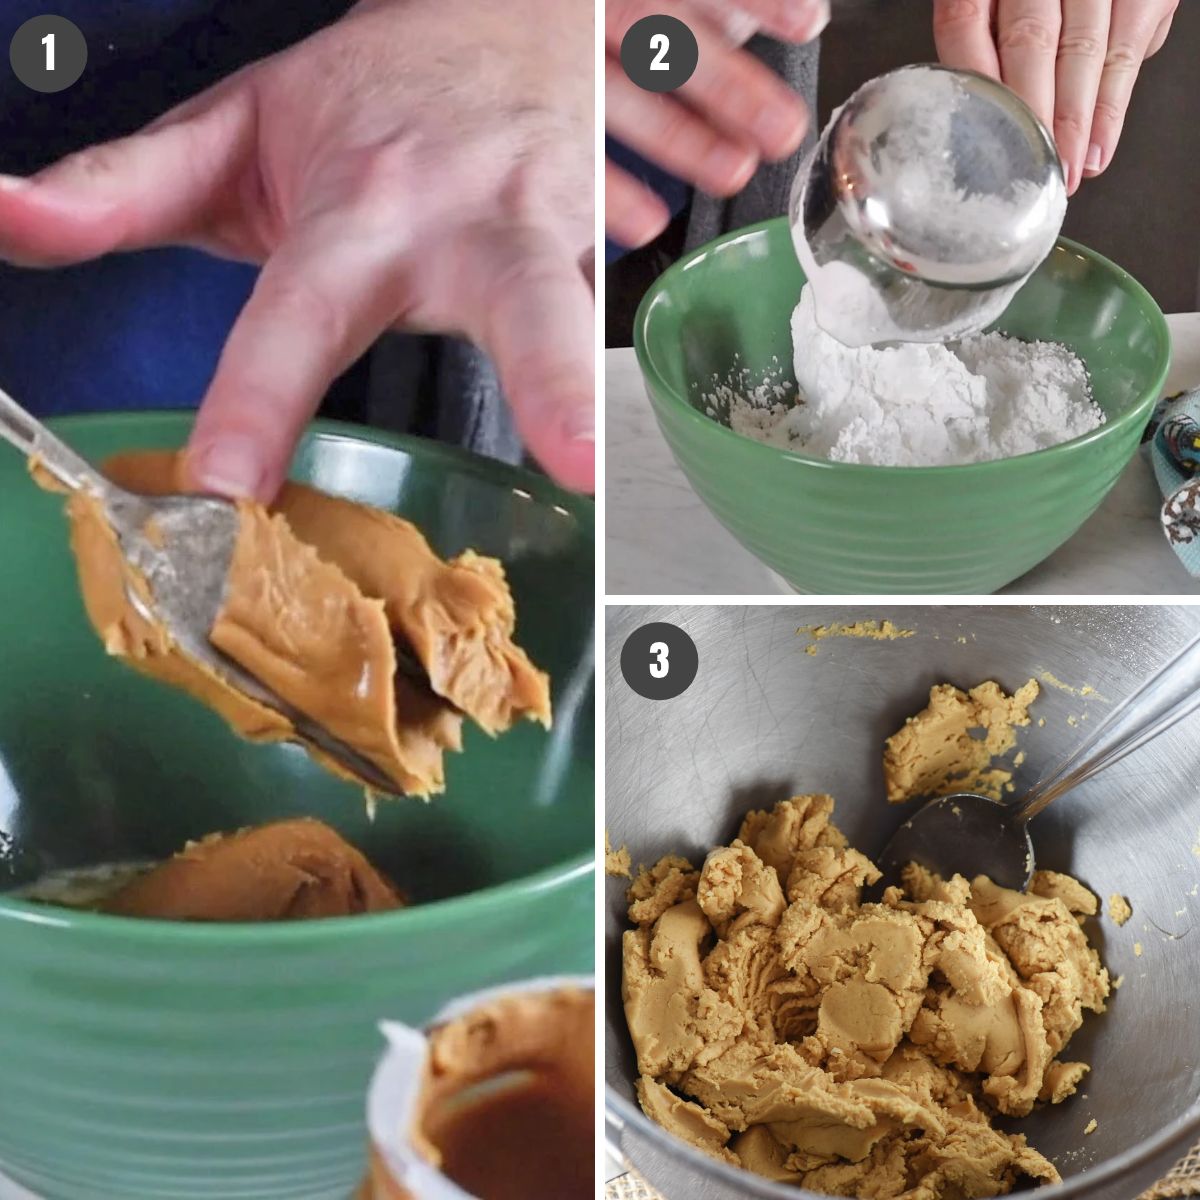
Shape into Balls
- Roll about 1 tablespoonful or a small cookie scoop full of the peanut butter dough between your hands. Continue to roll the dough into 1-inch round balls, and set on your baking sheet.
- Poke toothpicks into each ball. This is what you’ll use to dip them in chocolate.

Once all of the dough is rolled into balls, chill the whole sheet in the fridge or freezer for about half an hour.
Melt the Chocolate
To melt chocolate in the microwave, pulse it at 15 to 30 second intervals, stirring in between each cycle ’til melted. I recommend melting it in a deeper microwave-safe bowl for dipping, or in a 2-cup glass measuring cup like I do. Tip: Never melt it in a single saucepan on the stovetop, because the direct heat can cause it to seize; if you must use the stovetop, use a double boiler instead.
Depending on the type of chocolate, and especially with chocolate chips, some people like to add about 1 tablespoon of shortening or pre-melted paraffin wax per 1 cup of chocolate. This allows for a thinner, more shiny, glossy coat, but it’s not usually necessary with a high quality chocolate melting wafer.
Dip Your Buckeye Candy Balls
- Dip each peanut butter ball in the melted chocolate, leaving the very top un-dipped to resemble a real buckeye. Then set back on your baking sheet. If you don’t have toothpicks, we’ve used a couple table forks and a pair of tongs. You can also buy a dipping fork or tool.
- Chill them for about 15 to 20 minutes in the freezer. Then remove all the toothpicks and cover up the holes in the top of the ball with your finger (totally optional).

My buckeyes usually have kind of a chocolate ring around the bottom. You can avoid this by letting excess chocolate drip off the buckeye after dipping, and then lightly press the bottom of the buckeye on a separate sheet of wax paper before putting it back on your cookie sheet.

Let the chocolate dry and harden up before packing away into festive Christmas tins with chocolate peanut butter Ritz cracker cookies and fantasy fudge. One of my favorite ways to enjoy these bite-sized treats is with a mug of hot chocolate from chocolate chips!
Optional Add-Ins & Recipe Variations
There are quite a few ways you can change things up with this recipe.
- Add 1/2 teaspoon vanilla extract to the peanut butter mixture.
- Dip in white chocolate instead of regular chocolate.
- Make Buckeye balls with Rice Krispies mixed into the peanut butter dough.
- Add mini M&M’s or mini chocolate chips to the peanut butter mixture before shaping into balls.
- Sprinkle sea salt, chopped nuts, festive sprinkles, or Christmas colored sugar on top after dipping.
- Drizzle melted chocolate over the top after the chocolate coating has hardened.
Recipe FAQs
This is usually caused by oily, all-natural peanut butters. I recommend a regular creamy peanut butter like Jif or Skippy, because natural peanut butters will separate and cause a greasy dough that’s hard to form and resists the chocolate coating.
Sometimes chocolate can “seize” when it’s overheated, making it too thick for dipping. You can usually save it by thinning it out with 1 tablespoon of melted vegetable shortening per cup of chocolate, giving it a good stir. Pop it back into the microwave for a few seconds if necessary to get everything to incorporate.
Pack your buckeye candy balls into an airtight container or Christmas tin with a sheet of wax paper or parchment paper in between each layer. They’ll last a couple days on the counter, but I prefer to store mine in the fridge where they’ll easily keep for up to 2 weeks.
Yes, buckeyes freeze very well either before or after dipping. Stored in an airtight container or freezer bag to prevent freezer burn (don’t crush them by setting anything on top of them), they’ll last 3 months. Let them thaw overnight in the fridge before eating.

More Chocolate Covered Treats
If you try this recipe, why not leave a star rating in the recipe card right below and/or a review in the comment section further down the page? I always appreciate your feedback. You can also follow me on Pinterest, Facebook, YouTube, and Instagram. And subscribe to my email list too!

Buckeye Cookie Balls
Equipment
- Wax Paper or parchment paper
- festive Christmas tins for storage
Ingredients
- 3 tablespoons salted butter softened
- 1/2 cup creamy peanut butter *
- 1 cup powdered sugar
- 10 ounces dark chocolate melting wafers (or chocolate chips)
Instructions
- Before getting started, line a baking sheet with wax paper or parchment paper.
- Add your peanut butter and softened butter to a large mixing bowl.
- Dump the powdered sugar into the same bowl.
- Mix everything together by hand or with an electric mixer until it’s blended well.
- Roll about 1 tablespoonful or a small cookie scoop full of the peanut butter dough between your hands. Continue to roll the dough into 1-inch round balls, and set on your baking sheet.
- Poke toothpicks into each ball. This is what you’ll use to dip them in chocolate.
- Chill the whole sheet in the fridge or freezer for about half an hour.
- Melt the chocolate in the microwave in 15 to 30 second intervals, stirring in between each interval until melted.*
- Once chilled, dip each peanut butter ball in the melted chocolate, leaving the very top un-dipped to resemble a real buckeye. Then set back on your baking sheet.*
- Chill them for about 15 to 20 minutes in the freezer.
- Remove all the toothpicks and cover up the holes in the top of the ball with your finger (totally optional).
- Let the chocolate dry and harden up before packing away into festive Christmas tins.
Video

Notes
Nutrition
You can find my original recipe for buckeyes over at Adventures of Mel!

Thank you soo m I uch for this recipe! I made these and they are soo good!
I especially thank you for the toothpick tip, when I made them before, I used 2 forks, which is kinda messy!. I never thought about using toothpicks!
Bless you!!
That’s great, Margie! I’m so glad you liked it.